
News
Old Insulator Pendant Light
I often dream of creating lighting fixtures. It’s a way to use metalworking and some basic electric wiring skills I first learned when renovating our old house to create something custom and beautiful. Designing lighting fixtures resides on that list of things I’ll do someday, when I’ve got the time, but we know that someday doesn’t present itself. Luckily, a dear friend of mine happened to mention that she liked some repurposed antiques turned into lights when we were at the Market of Curiosities. Here, I just happen to have a collection of old glass insulators and I figured this was my opportunity to flex that creative muscle.
Now things didn’t turn out quite as planned or run as smoothly as I might have liked, but for a first time attempt at a long time desire, I think each design problem was solved. The first issue is that many repurposed insulator lights are larger domes than what I had in my collection. Making a smaller light wouldn’t be a problem, if the fittings were available in smaller sizes. I anticipated a track light pendant system and got the pieces needed from the hardware store. From a previous job, I knew glass could be drilled if wet or underwater and the wisdom of the internet taught me about a 1/4″ diamond bit hole saw that can be put in a drill press. Metalledwith man Josh was very helpful in creating a jig that would stabilize the glass and center it for the hole saw bit, even though the surface was both domed and smooth. The glass will shatter if the right touch is not applied. By plunging without too much force, the diamond will grate the glass away–everything must stay well-lubricated so as to not overheat the bit or the glass.


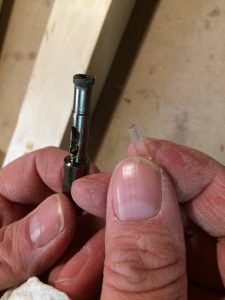
With the insulator now drilled and ready to go, figuring out the rest of the assembly was the next task. This is when I realized that the ceramic fittings would not easily work with the insulator itself. We took apart the fitting, bent it to try to fit into the insulator and rewrapped with electrical tape (the insulator is clear, so colored wiring would distract). The candelabra type bulb fitting presented the next challenge–there was no way to get the bulb up into the insulator. I looked at a number of different bulbs before deciding to go with a “60watt” LED. After a few different design plans, I decided the best thing to do was to lengthen the pendant and think outside the insulator.
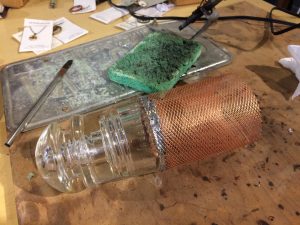
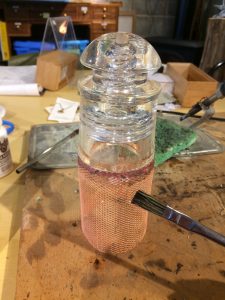
I took some copper mesh and created a double layer lampshade type design. Working with copper mesh is the worst in cold weather, when your hands are already cracking from the dryness and cold. Once I had the “shade” made, affixing it to the glass was the next issue. Glues are unsightly and could lose their adhesive properties in the warmth of the light. Tapes could hold to glass, but not mesh. The solution was to solder it like we do for stained glass. Copper tape to the base of the glass insulator and lead-free silver bearing solder and an iron to marry the mesh to the glass. In my glass working supplies I also have copper patina for solder. I’d have liked it a bit neater, but having the patina certainly helps the overall design.
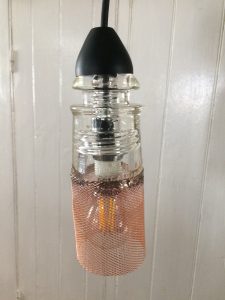
My quick photo of the finished light is above. If I had photographed at different angles, I think it would do better justice to the overall look.